Dev/Stage env — How it works (KB Article)
The Dev/Stage env tab in Website Settings lets you link one dev/stage domain to a licensed live website, so you can test accessibility fixes and tool behavior before deploying changes to production.
Where to find it
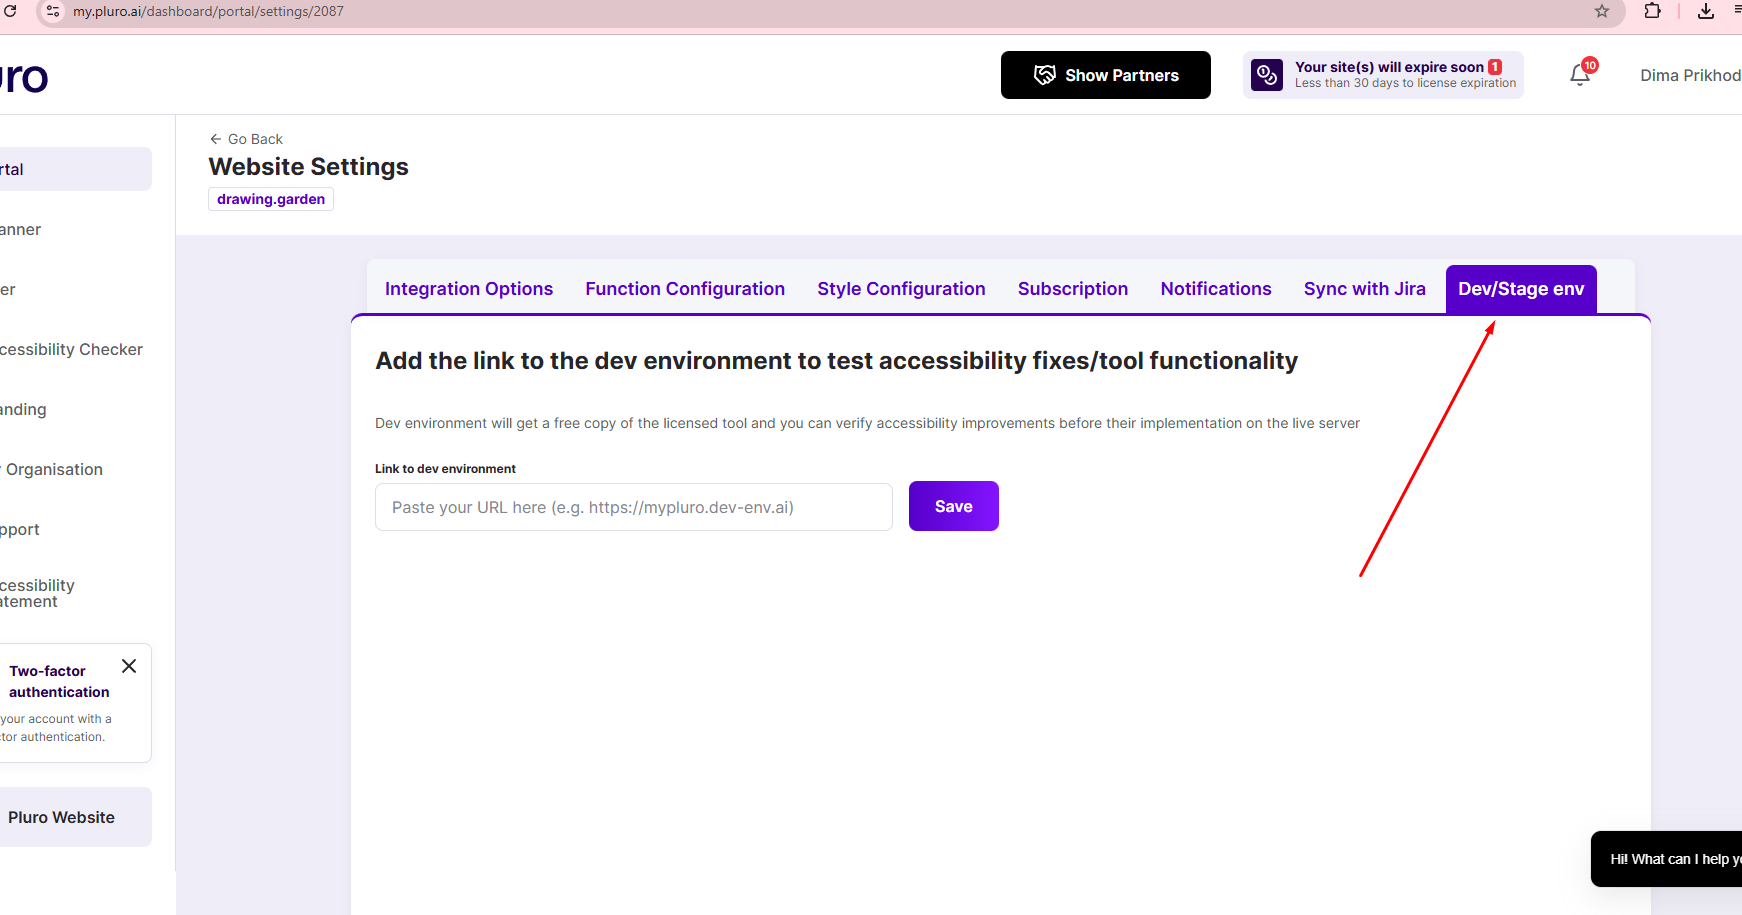
Go to Portal → Website → Website Settings → Dev/Stage env.
The Dev/Stage env tab appears in the settings tabs row (top-right area). (See Figure 1.)
How to set up a Dev/Stage environment
-
Open Website Settings for your licensed live website.
-
Go to the Dev/Stage env tab. (Figure 1)
-
Paste your dev/stage URL into Link to dev environment (recommended: the root URL, e.g.,
https://dev1.example.com/). -
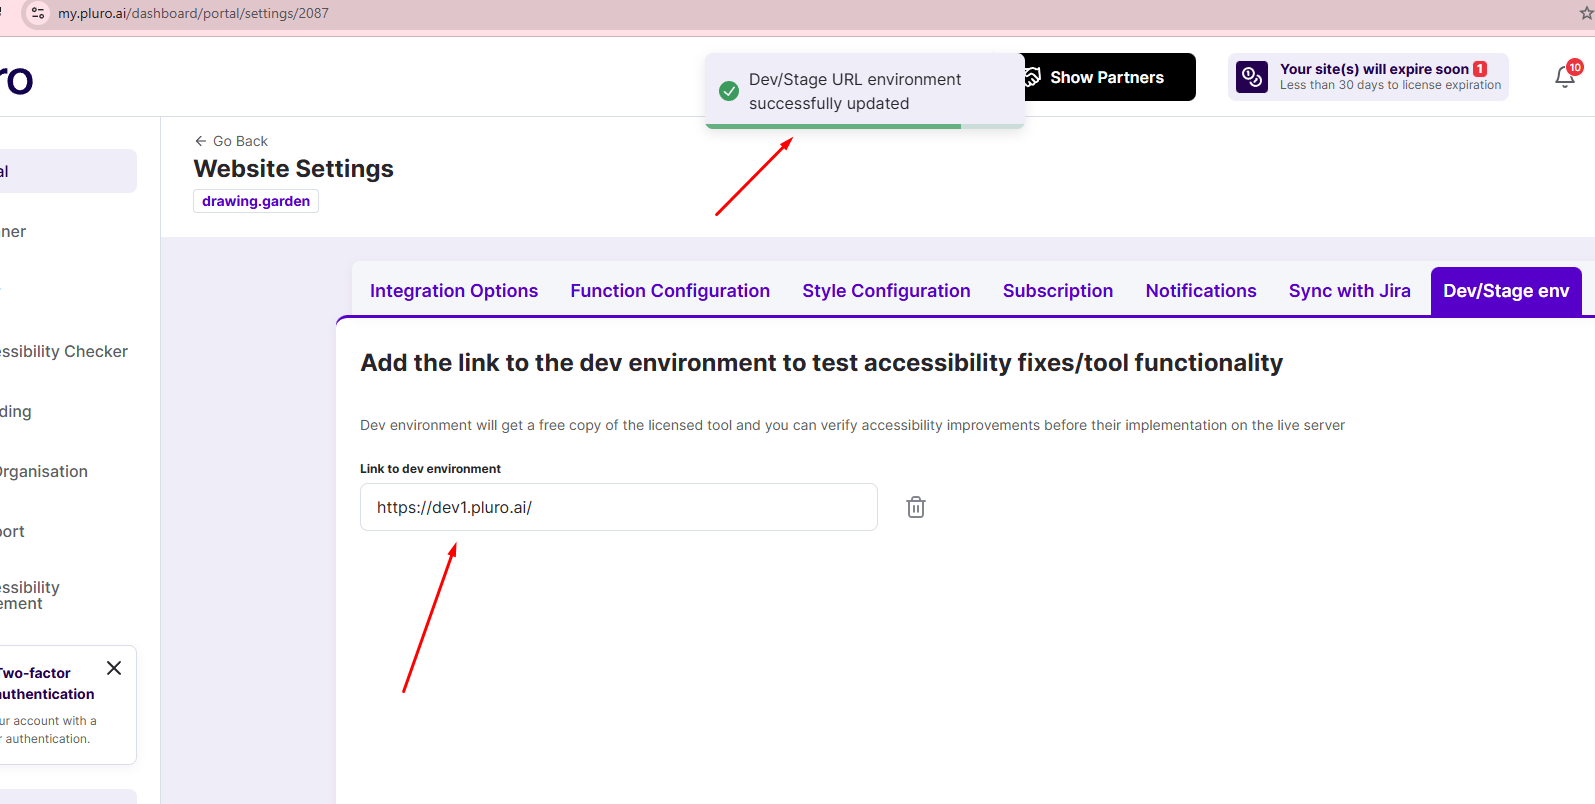
Click Save.
-
When saved successfully, you will see a confirmation toast: “Dev/Stage URL environment successfully updated” and the URL will remain in the field (with a Delete icon available). (See Figure 2.)
Note: Only one dev/stage domain can be linked at a time. If your dev server changes, delete the existing URL and save a new one. (Figure 2 shows the Delete icon next to the field.)
What happens after saving?
After you link a Dev/Stage URL:
-
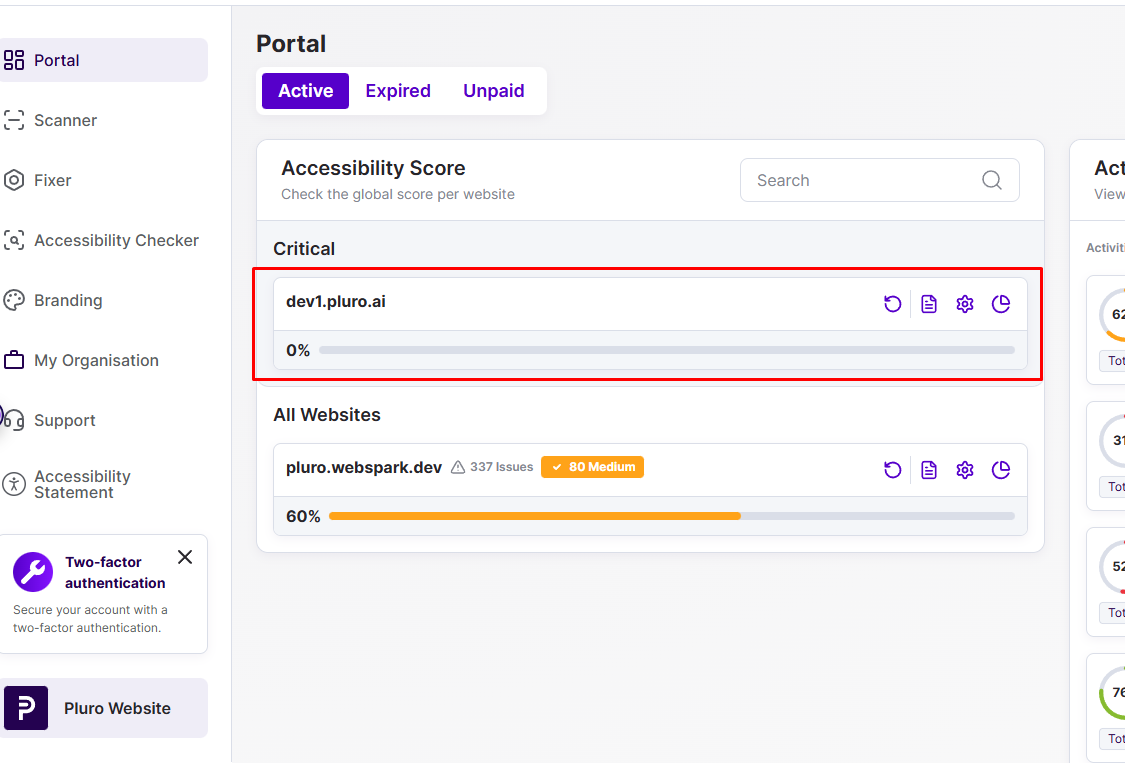
A Dev env website entry will appear in the Portal list.
-
You can use it like a regular website in Pluro:
-
install the script on the dev site
-
apply custom settings and custom code
-
run checks/scans and validate fixes
(See Figure 3 — the Dev env appears in the Portal list.)
-
Important limitations (must read)
Only 1 Dev/Stage per live website
Each licensed live website can have one linked Dev/Stage environment.
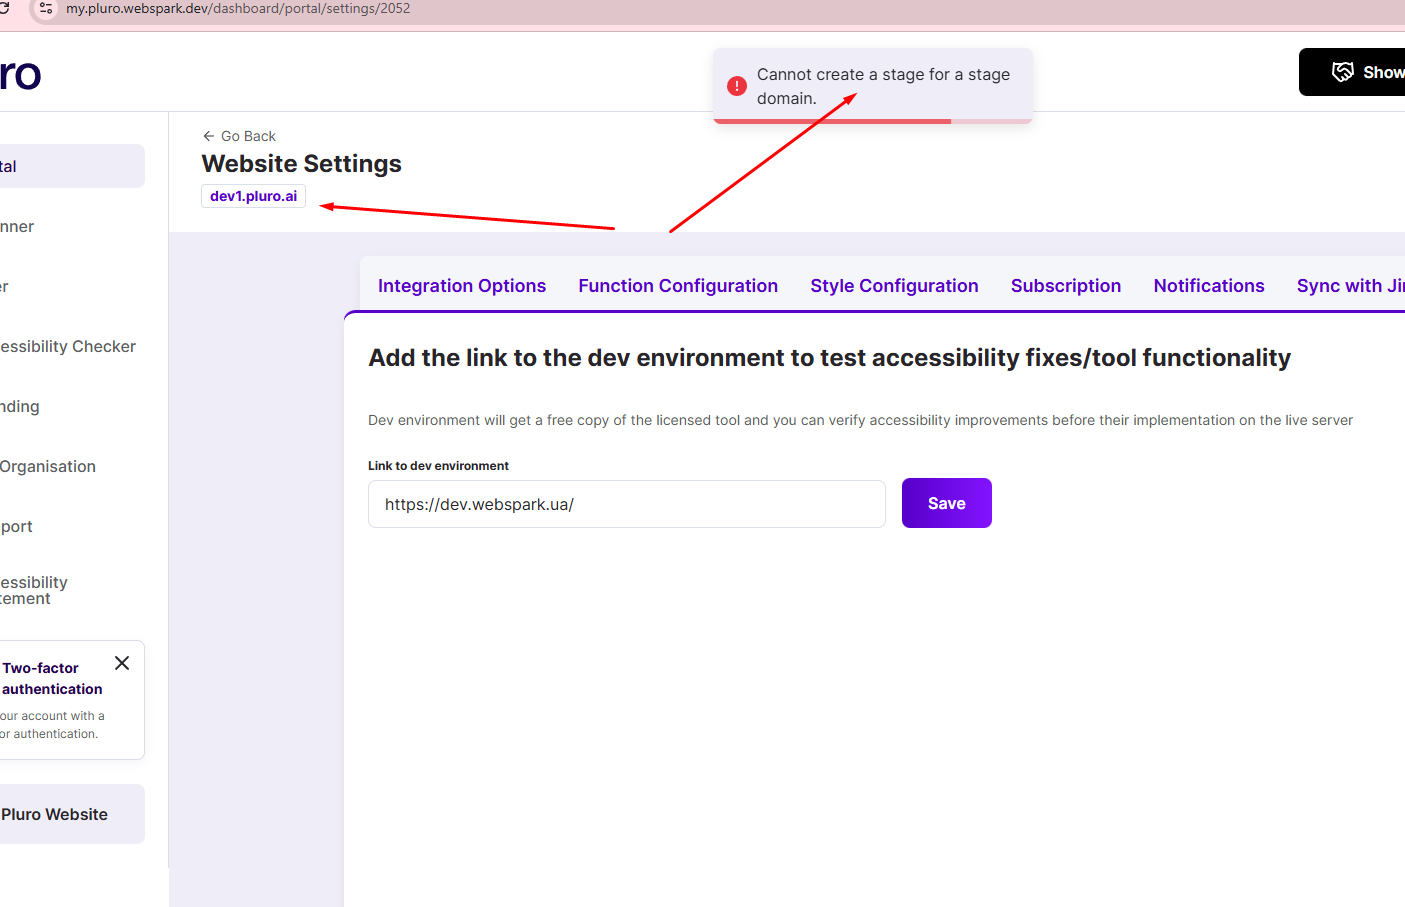
You cannot create a stage for a stage
If you open Website Settings for a Dev/Stage website and try to add another Dev/Stage URL, the system blocks it and shows:
“Cannot create a stage for a stage domain.” (See Figure 4.)
Meaning: Dev/Stage is configured only from the live website settings, not from inside a dev/stage website.
Dev/Stage availability depends on the live license
Rule: 1 licensed live site = 1 dev server, with the same license-related limitations.
If the live license expires, the dev site will also be treated as expired/unavailable for customization.
Troubleshooting
-
Dev env doesn’t appear after Save: refresh the Portal page and confirm you saw the success message. (Figure 2)
-
Seeing “Cannot create a stage for a stage domain.”: you’re trying to configure Dev/Stage from a dev/stage website—go back to the live website settings. (Figure 4)
-
Dev env shows 0% / no data: run a scan/check to generate results. (Figure 3 shows the dev entry before results accumulate.)
Figures — uploaded screenshots and where to place them
-
Place in article: under “Where to find it” (shows the Dev/Stage env tab highlighted).
Figure 2 — URL saved successfully + Delete icon
-
Place in article: after Setup step 5 (shows success toast and the URL field with the delete icon).
Figure 3 — Dev env appears in Portal list
-
Place in article: under “What happens after saving?” (shows
dev1.pluro.ailisted in the Portal).
-
Place in article: inside “You cannot create a stage for a stage” (shows the exact error message).